라즈베리파이 피코 보드에 대한 설명은 다른 곳에도 많이 있네요.
라즈베리파이 MCU 버전, 아두이노와 유사한 플랫폼입니다. 더 자세한 설명은 아래글...
RP2040 RaspberryPi Pico 간단히 알아보기 --> divenire.tistory.com/292
라즈베리파이의 첫번째 MCU, RP2040 및 라즈베리파이 피코 소개
오픈소스 하드웨어의 대표주자인 라즈베리파이는 최근까지도 AP의 빈약한 GPIO로 애플리케이션의 엔드포인트에 이렇다 할만한 개선점이 크게 없었습니다. 호환성을 위해 GPIO 핀맵을 고수한 점은
divenire.tistory.com
MicroPython vs CircuitPython for 이더넷 기능
Raspberry Pi Pico 보드에 Ethernet 기능을 추가하기 위해 위즈네트 W5500 칩을 연결해 보도록 하자.
마이크로 파이썬에서 제공하는 라이브러리가 있으면 더 좋은데, 그건 안보이고
WIZNET5K 라는 이더넷 파이썬 라이브러리 활용을 위해 우선 CircuitPython 환경으로 바꾸면 편리하다.
Micropython 이나 CircuitPython 이나 머 메인을 작성하는데는 무리가 없다. 둘다 파이썬이니깐..
Adafruit 을 중심으로 제공되는 CircuitPython은 Micropython의 자식 버전으로 몇가지 컴포넌트의 기능과 예제들을 추가해 두고 쓰고 편리하다는 거 그정도가 차이가 있다고 생각하면 된다. 내 생각에는 어떤 것을 써도 비슷비슷, 더 알고싶다면 아래쪽 글을 읽어보는 것도 좋아요~~
Getting Started with Raspberry Pi Pico and CircuitPython
The Raspberry Pi foundation changed single-board computing when they released the Raspberry Pi computer, now they're ready to do the same for microcontrollers with the release of the brand new Raspberry Pi Pico.
learn.adafruit.com
라즈베리파이 피코 보드에 CircuitPython 설치하기
일단 라즈베리파이 피코 보드을 CircuitPython 환경으로 변경시키면 W5500을 활용하는 데는 아두이노와 유사하게 사용할 수 있다.
아래 링크에 환경을 바꾸는 방법을 기록해 두었다.
Raspberry Pi Pico IoT Demo - W5500 Ethernet + NeoPixel LED
HOWTO: Let's make a simple IoT RGB control project with Raspberry Pi Pico, WIZnet W5500, NeoPixel , WIZNET5K Adafruit lib on CircuitPython. By Bongjun Hur.
www.hackster.io
간단하게 한글로 가져오면,
1. 일단 아래 uf2 파일을 다운로드 한다. 아무곳에서 다운 받아도 된다.
- 개인 github repo - https://github.com/bjnhur/pico-W5500/blob/main/adafruit-circuitpython-raspberry_pi_pico-en_US-6.2.0.uf2
- OR original files from adafruit CircuitPython 6.2.0 - adafruit-circuitpython-raspberry_pi_pico-en_US-6.2.0.uf2
2. 라즈베리파이 피코 보드에 BOOTSEL 을 누른 상태에서 USB을 연결한 다음 버튼을 뗀다.
Push and hold the BOOTSEL button and plug your Pico into the USB port of your Raspberry Pi or other computer. Release the BOOTSEL button after your Pico is connected.
3. 그러면, 아래 그림처럼 RPI-PR2 라는 드라이버가 잡힐 것이다. It will mount as a Mass Storage Device called RPI-RP2.
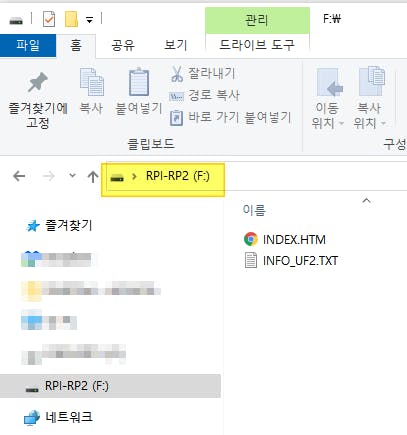
4. 그럼 아까 받아놓은 uf2 파일을 해당 드라이버로 복사한다. 그러면 자동으로 CircuitPython을 쓸 수 있는 상태가 된다. 아래 그림처럼 자동으로 "CIRCUITPY" 드라이버가 인식됨을 볼 수 있다.
Drag and drop the CircuitPython 6.2.0 UF2 file onto the RPI-RP2 volume. Your Pico will reboot. You are now running CircuitPython. If you see "CIRCUITPY" drive volume, you're ready to enjoy CircuitPython on your Pico board as below pic.
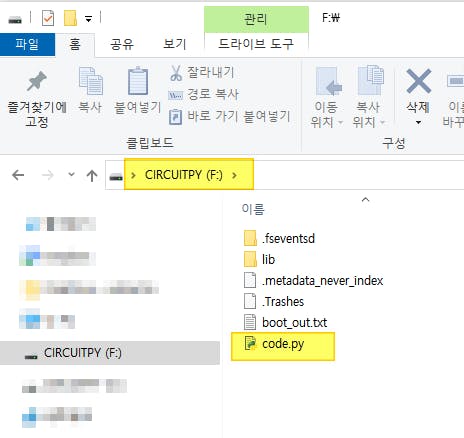
이제 여기에 있는 code.py 를 수정해서 저장만 하면 RP2040 Raspberry Pi Pico 보드가 자동으로 변경내용으로 실행된다.
자 그럼 이제 핑을 해볼까나?
2021.04.19 - [IT/IoT | Hardware] - Raspberry Pi Pico + Ethernet 연결하기 2 - Ping 라즈베리파이 피코 W5500
Raspberry Pi Pico + Ethernet 연결하기 2 - Ping 라즈베리파이 피코 W5500
이제 소프트웨어 환경은 Raspberry Pi Pico + Ethernet 연결하기 1 - 라즈베리파이 피코 W5500 에서 완성이 되었고, Raspberry Pi Pico W5500 Ethernet 하드웨어 연결 Raspberry Pi Pico 보드와 W5500 내장한 WIZ8..
wiznxt.tistory.com
BJ.
'IT > IoT | Hardware' 카테고리의 다른 글
| Raspberry Pi Pico + Ethernet 연결하기 3 - DHCP 라즈베리파이 피코 W5500 (2) | 2021.04.19 |
|---|---|
| Raspberry Pi Pico + Ethernet 연결하기 2 - Ping 라즈베리파이 피코 W5500 (0) | 2021.04.19 |
| 공부 - 보안 – 경량암호화 기술 (0) | 2020.06.25 |
| 스마트 모빌리티 지향의 V2X 산업 동향 - ITFIND (0) | 2020.06.23 |
| 사전 프로비저닝된 보안 요소: AWS IoT를 위한 Trust&GO 시작하기 (0) | 2020.06.23 |
